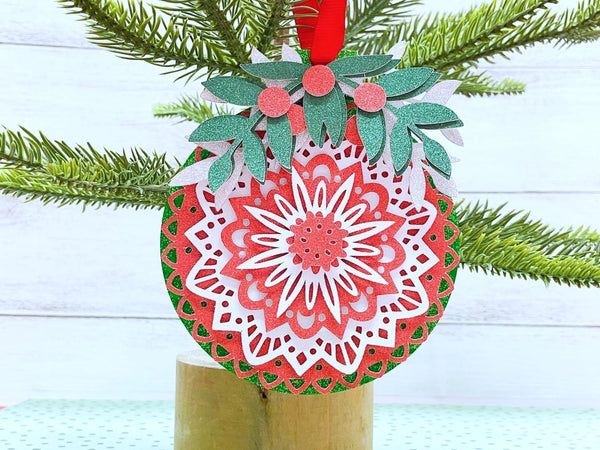
Hi, friends Ivy here from @ivypinkmade. It’s that time of the year where we start all the holiday DIYs. One of my favorite things to make is handmade ornaments. Today I’m sharing a really easy layered ornament from Cricut Design Space, so let’s get started!
SUPPLIES:
- Cardstock Warehouse Cardstock Papers
- Silver MirriSparkle
- Red Wagon
- Evergreen Mirrisparkle
- White Diamond Print Glitter
- Electronic Cutting Machine
- Foam Tape
- Acrylic Paint
- Wood Ornament Blank (optional)
- Large Rhinestone (optional)

I am using this Layered Christmas Ornament from Cricut Design Space. This was designed by former Cardstock Warehouse Design Team member, Randall. (@craftateria)

The first step was to resize the ornament to fit the wooden ornament blank. I resized it to 3.75in x 3.75in, not including the leaves on top. This cut file cuts 2 sets because it’s front and back but because I am adhering it to a wooden blank, I am only decorating one side. If you only want to decorate one side, delete the second layer. If you want it to be double-sided, keep the file the way it is and it will cut 2 sets.

Use an electronic die cutting machine and cut the layers according to the colors you want them to be. Don't forget to use the double-cut settings for heavier cardstocks. You can find all our die-cut settings HERE.

While the pieces are cutting, go ahead and paint the wood blank. I used green plain and green glitter acrylic paint.

Layer the pieces using foam tape in between each layer to give it dimension.

Once you have the layers built, adhere the ornament to the wood blank.

Now you have a beautiful layered ornament!

Thank you for stopping by today! I hope you enjoyed this fun project.
Please tag us on Instagram or Facebook. We would love to see what you make! Use #cardstockwarehouse to be featured on our page!
Happy Christmas Crafting!
IvyIG: ivypinkmade
PS- Looking for more Christmas inspiration? You can find all of our Christmas Blogs HERE!


