

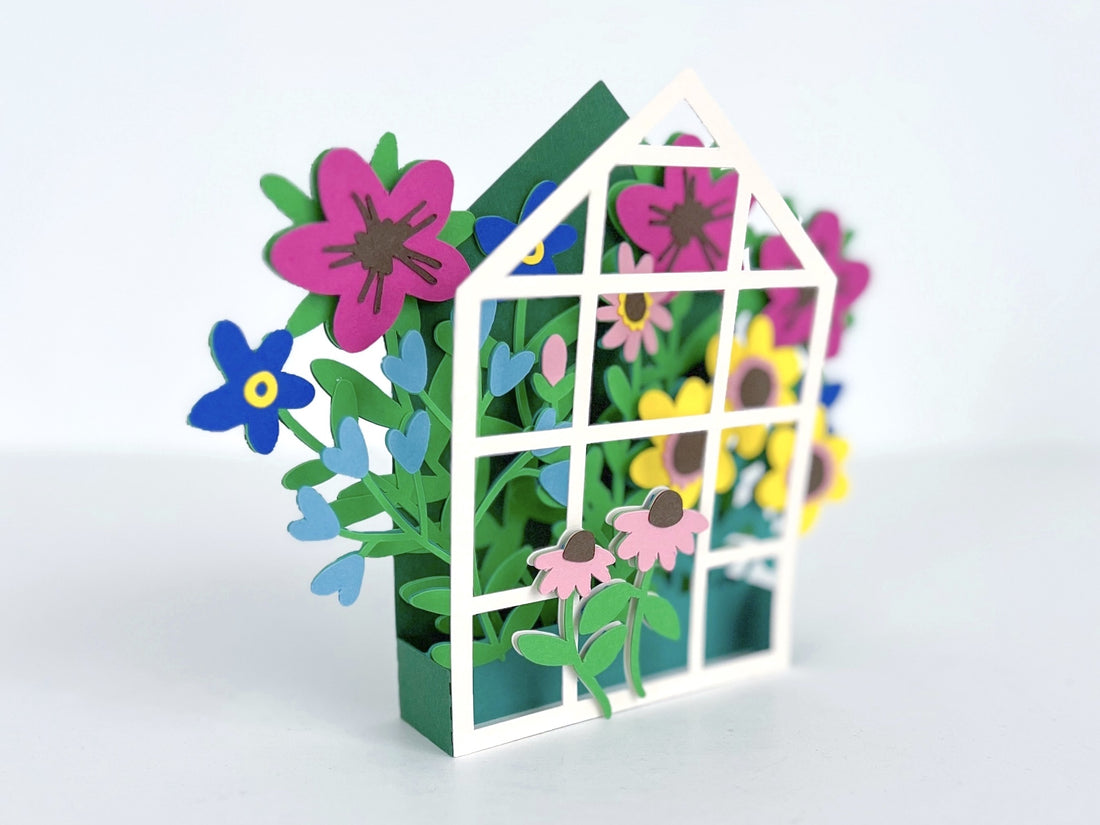
Hi, crafty friends! Spring is synonymous with flowers, and today we are going to make some adorable paper flowers. The best part about these flowers is the cute little pop-up greenhouse card they are attached to! This card is super fast to make and very helpful if you’re in a time crunch. Seriously, I spend more time looking through cards at the store than it took to make this one! And no one wants a generic store-bought card anyway! ;-) Follow along to make your own!
Materials:
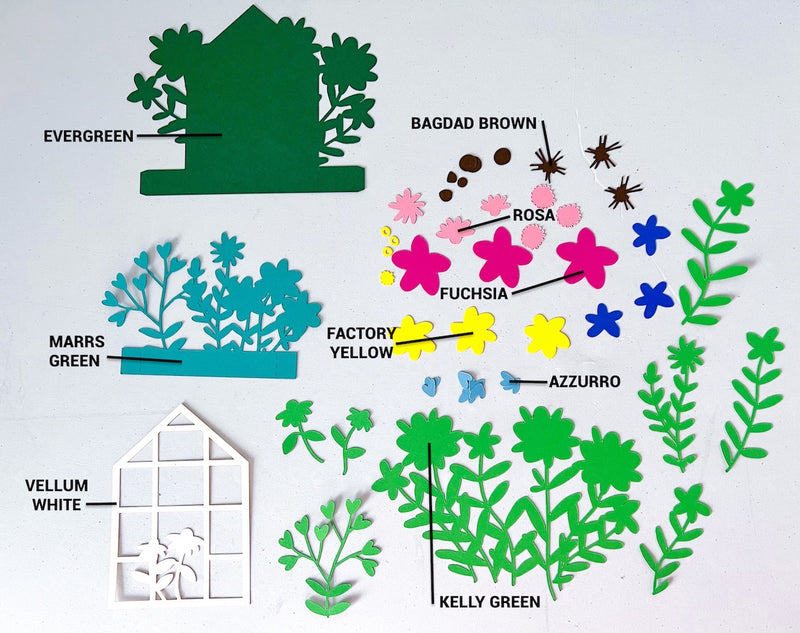
- Cardstock Warehouse Papers:
- Lessebo Colours 83lb: Kelly Green, Evergreen
- Colorplan 100lb: Marrs Green, Fuchsia Pink, Factory Yellow, Bagdad Brown, Vellum White
- Woodstock 83lb: Azzurro, Rosa
- Creative Fabrica File - Spring Card SVG
- Cutting Machine (I'm using a Cricut)
- Bearly Art® Glue
- Foam Strips/Cubes (Optional)
To begin this project, you’ll need to upload the SVG into your preferred cutting machine. Adjust the score lines for your particular machine, if necessary. (Dashed cut vs scoring tool.) Below are the colors I cut each piece in.
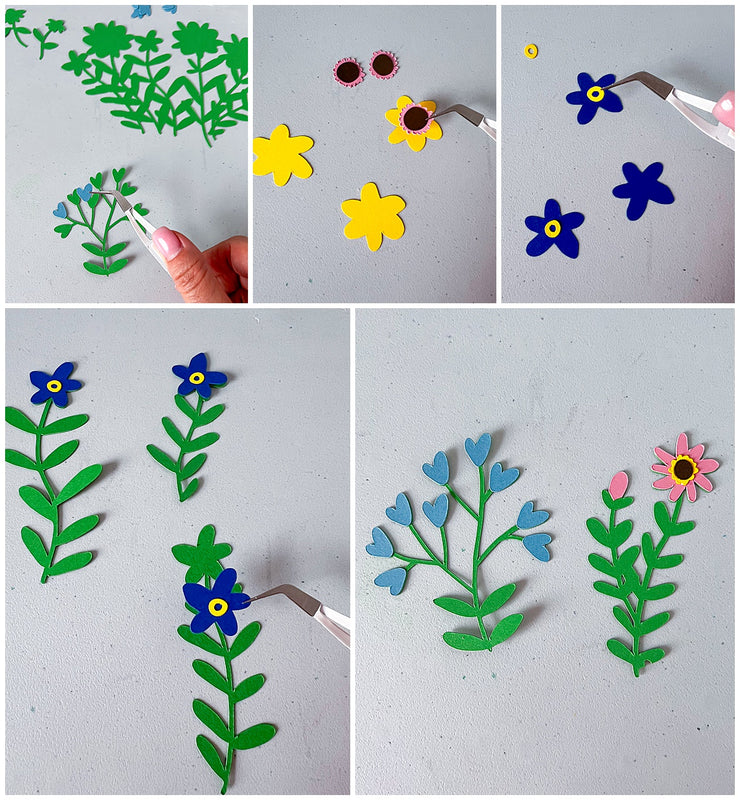
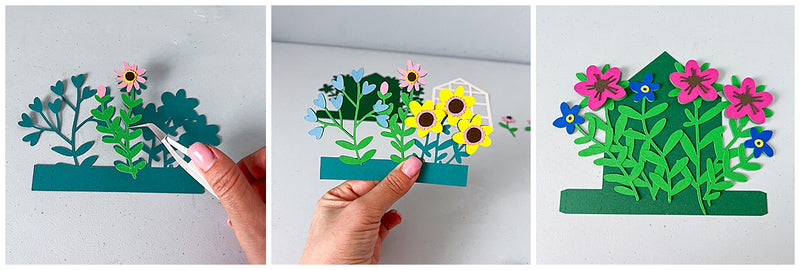
To start my card, after I laid out all of my pieces, I began gluing all of the small colorful pieces onto the green stems. I love watching all of the details come together. I glued these with Bearly Art® glue using craft tweezers since the die cut pieces are pretty small.
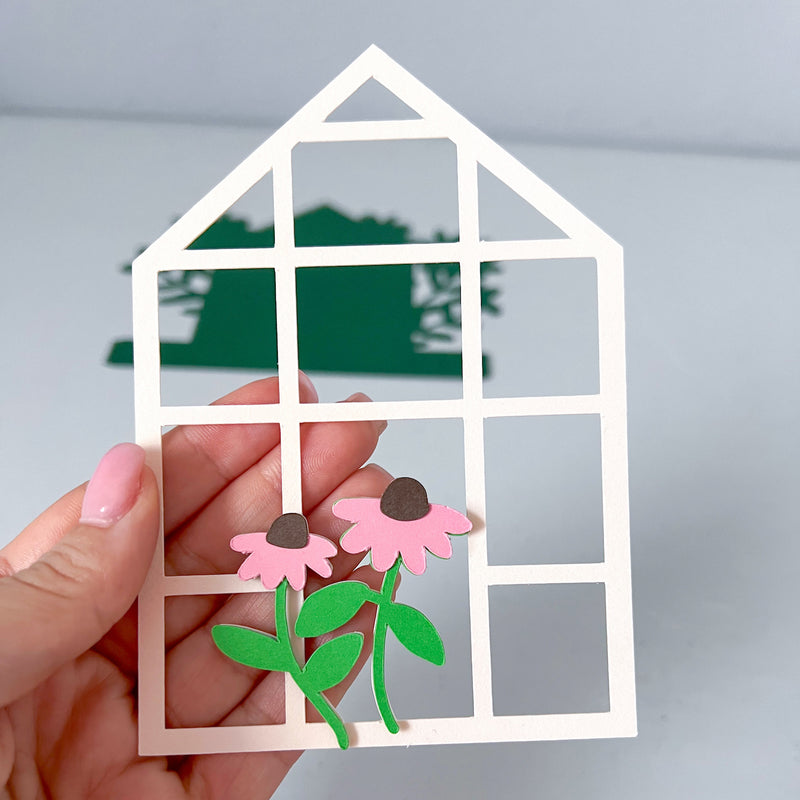
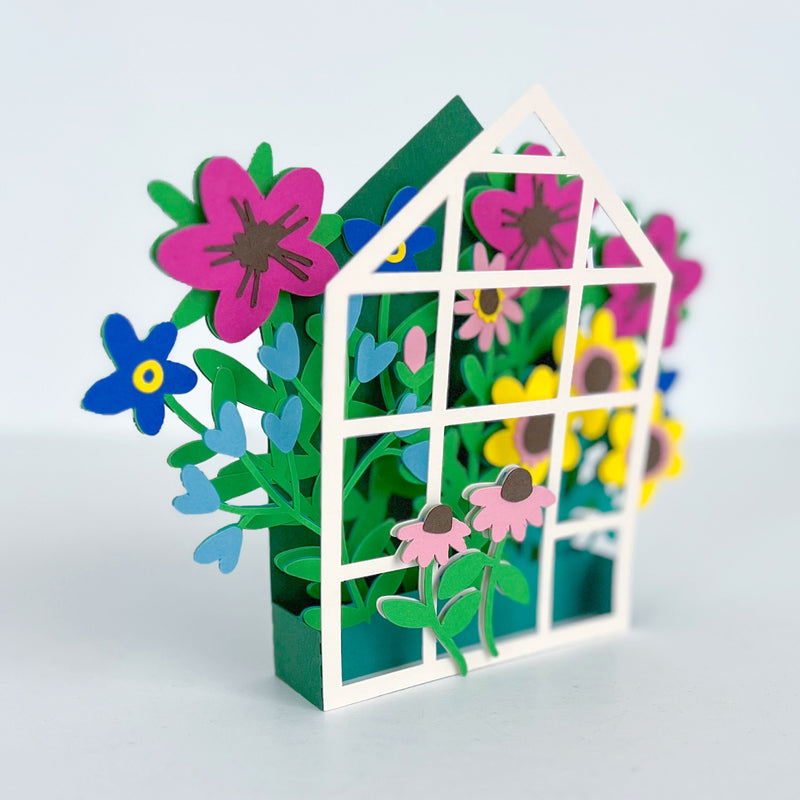
After this was complete, I decided to do the front of my card. This is the front of the greenhouse and has the "windows" cut out. I attached my assembled pink flower using small pieces of foam tape to give it some dimension, but that is totally optional.
Then I went back to assembling the stems. For some of the flowers, I added foam tape before gluing directly onto the parts of the card that will make your pop-up base. I just chose random ones to give more variance to the heights of the flowers.

Once I had them all set up, I started gluing them directly onto the back panels using Bearly Art® glue. I used my tweezers again since the pieces are small.
Now that all of the flowers are glued onto their panels, we’re going to take the dark green panel and glue the folded sides upwards so that the front piece of the card (with the white greenhouse windows) sits nicely on top of it. Place glue on the front tabs, then attach the front panel to the tabs, holding them until they've fully dried.

The middle panel (with the yellow flowers) is the last part to glue. Fold the left tab up and the right tab down, add glue to each tab, and then place them between the front and back layers. The tabs are glued two different directions so that the card can fold flat and fit in an envelope. (Mailing bulkier cards often requires more postage due to their weight and/or thickness. Take your card to your local post office for guidance.)
I hope this project inspired you to Make Something Beautiful®! This would be a perfect card to send for Mother's Day, a birthday, or really ANY special occasion! Who doesn't love receiving flowers?
You could also glue a die-cut name on the front of them and use them as place cards on your table for a bridal luncheon, Mother's Day brunch, or any other events.
Follow me at @lacedesignsstudio for more party and paper decor ideas, and share your creations with Cardstock Warehouse on Facebook and Instagram! Tag your projects with #cardstockwarehouse to be featured on our page!
Happy Crafting!
Amanda (@lacedesignsstudio)